Inspired by: Honeyed Plum Jam recipe from nannascookbook.blogspot.com
Yield: about 2-3 pints of jam
2 lbs of plums, skins left on
2 tbsp freshly squeezed lemon juice
1 packet powdered fruit pectin, the "no sugar needed" variety
1/2 cup water
1/2 cup honey
1/2 cup blue agave nectar
1. Thoroughly wash plums in a colander and remove any stems. Cut the plums in half; remove the pits. Proceed to chop the plums, removing any brown or mushy spots as you go. You should be left with about 5 cups of chopped and pitted plums. Pour the lemon juice over the plums to help avoid any discoloration. [Note: The acid from the lemon is also essential in the jam-making process, so do not skip this step.]
2. Thoroughly wash all mason jars, jar lifter, tongs, funnel, magnetic wand, and any other equipment you will be using to make the jam in hot, soapy water. Rinse well and place everything except for the top part of the lids in your largest pot or your canning kettle. Cover everything with water by 1-2 inches. Bring to a boil. Boil for 10 minutes to sterilize and then turn off the heat. Wait about 5 minutes after you turn off the heat, and then add the lids. Leave everything in the covered pot until ready to use. [Note: The top part of the lids cannot be placed in the pot for the sterilization process because the heat will melt the sealing compound, thus rendering the lid useless. The screw-top rings can be placed in the kettle for the full boil.]
3. Meanwhile, as the equipment is being sterilized, combine the plums soaked in lemon juice with the pectin in a heavy-bottomed pot and place over medium to medium-high heat. As they cook, the plums will slowly begin to generate their own liquid.
4. Once the plums become a little mushy, about 5 minutes, stir in the 1/2 cup water. Stirring often, cook the plum mixture until it comes to a boil.
5. Once the mixture boils, add the honey and agave nectar. Mix thoroughly. Remove any foam that forms on top of the mixture. Cook for another 10-15 minutes, stirring at regular intervals until it thickens into a syrupy consistency and reaches another boil. Cook for one full minute while at a rolling boil. Turn off the heat. [Note: During this final stage, if the plum segments are too large and have not reached a jam-like consistency, use a potato masher to help break them up further.]
6. Carefully remove all tools from the canning pot first, placing them on a clean towel. As you begin to remove the jars with the jar lifter, tilt them over the pot to let all the water drain out. Place the jars on the clean towel as well. [Note: If you have a granite, marble, or any other heat sensitive counter top, place a large cutting board in between the counter and the clean towel in order to protect the surface from the very hot jars.]
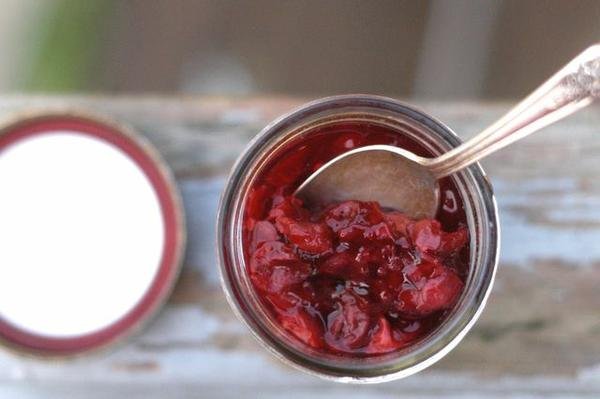
7. Using the funnel, work quickly and carefully to ladle the hot jam into the hot jar. Leave about 1/4 to 1/2-inch space, called headroom, between the jam and the top of the jar. Repeat for remaining jar(s). Carefully wipe the sealing surface of the jar with a clean paper towel that has been dampened with hot water in order to remove any jam or sugar crystals. [Note: If you end up with one jar that is only half full like I did, it should not be processed; therefore, it should not be taken through the remaining steps listed below. Instead, let the jam cool in the jar, place the lid on it, and then store it in the refrigerator. Use within 2-3 weeks.]
8. Remove a lid from the hot water with the magnetic wand. Place the lid on a jar, being careful not to touch the interior of the lid with your hand. Once the lid is centered on the jar, screw the band over the lid until barely tight. Repeat with other jar(s).
9. Load the filled jars, fitted with lids, into the canning pot one at a time, using your jar lifter, and keeping the jars upright the entire time. Cover the jars with more water, if needed. Water should cover the jars by 1-2 inches of water. Cover the pot with its lid; turn the heat to its highest setting until it reaches a vigorous boil. Once the boil begins, process the jars for at least 5 minutes. [Note: More time is needed for higher elevation.]
10. When the jars have been processed in boiling water for the recommended time, turn off the heat and remove the canning pot lid. Wait 5 minutes. Remove jars from canning pot; use a jar lifter and keep jars upright. Carefully place them directly onto a towel or cake cooling rack, leaving at least 1 inch of space between the jars during cooling. Avoid placing the jars on a cold surface or in a cold draft. Also avoid touching them for at least several hours.
11. Cool jars upright for 12-24 hours while vacuum seal is drawn and jam sets up. Let the jars sit undisturbed while they cool. Do not tighten ring bands on the lids or push down on the center of the flat metal lid until the jar is completely cooled.
12. Once completely cool, test the jars' seal by pressing down on the center of the flat metal lid. If the lid pops up and down it has not formed a seal and is not preserved. Put any unsealed jars in the refrigerator and use within 2-3 weeks. If the metal lid is unyielding when pressed, then your jars have been preserved. Preserved jars of jam should last between 8-12 months. Label preserved jars with the date, and then store in a cool, dry place with the rings off.
Note: Please use common sense when it comes to consuming the preserved jam and discard it if it looks or smells off. Once opened, store in the refrigerator and use within 2-3 weeks.